Adding Alt Text to Blackboard
![]()
Image Content Type
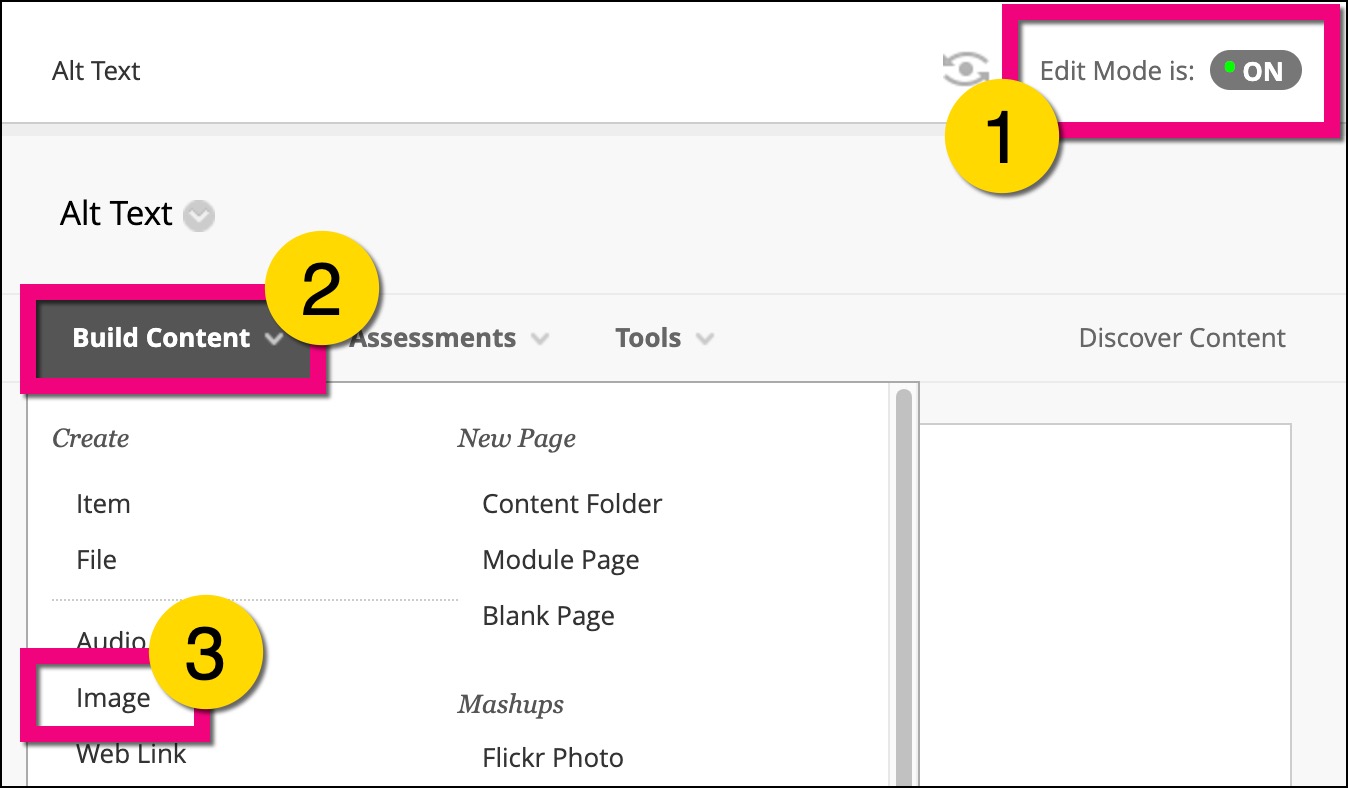
1. Navigate to where you want to add an image and ensure Edit Mode is On.
2. Expand Build Content.
3. Scroll down and select Image.
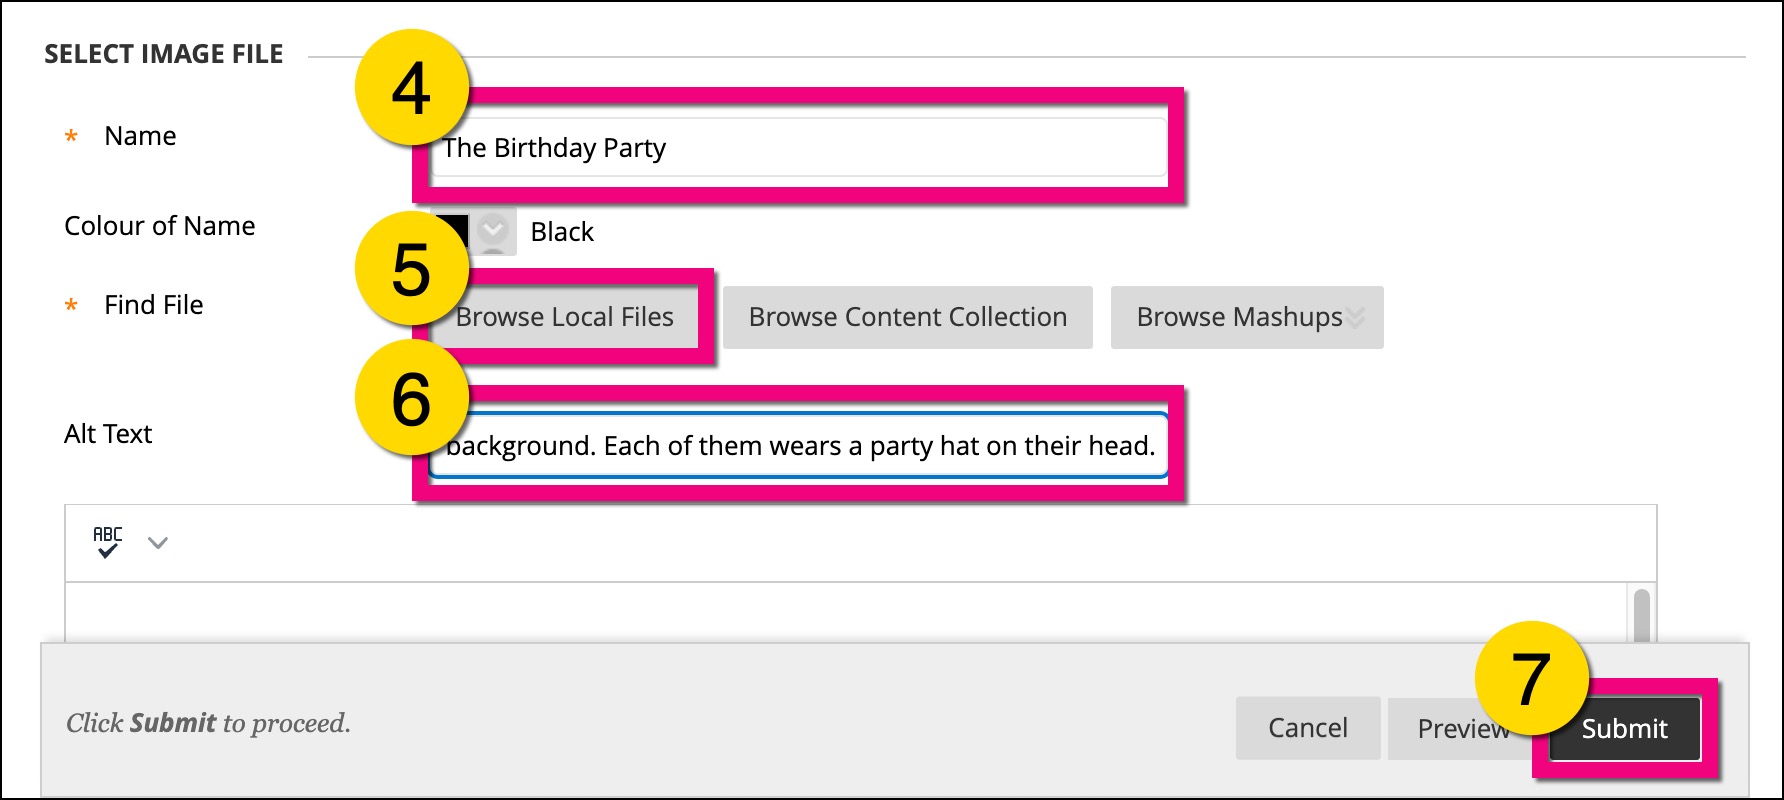
4. Give the image a short name/title.
5. Select Browse Local Files and choose the relevant image from your PC.
6. Type in an appropriate description of the image in the text box next to Alt Text.
7. Click Submit.
You can check if the alt text has been applied successfully by hovering your mouse over the published image; a small pop up with the alt text should appear over the image.
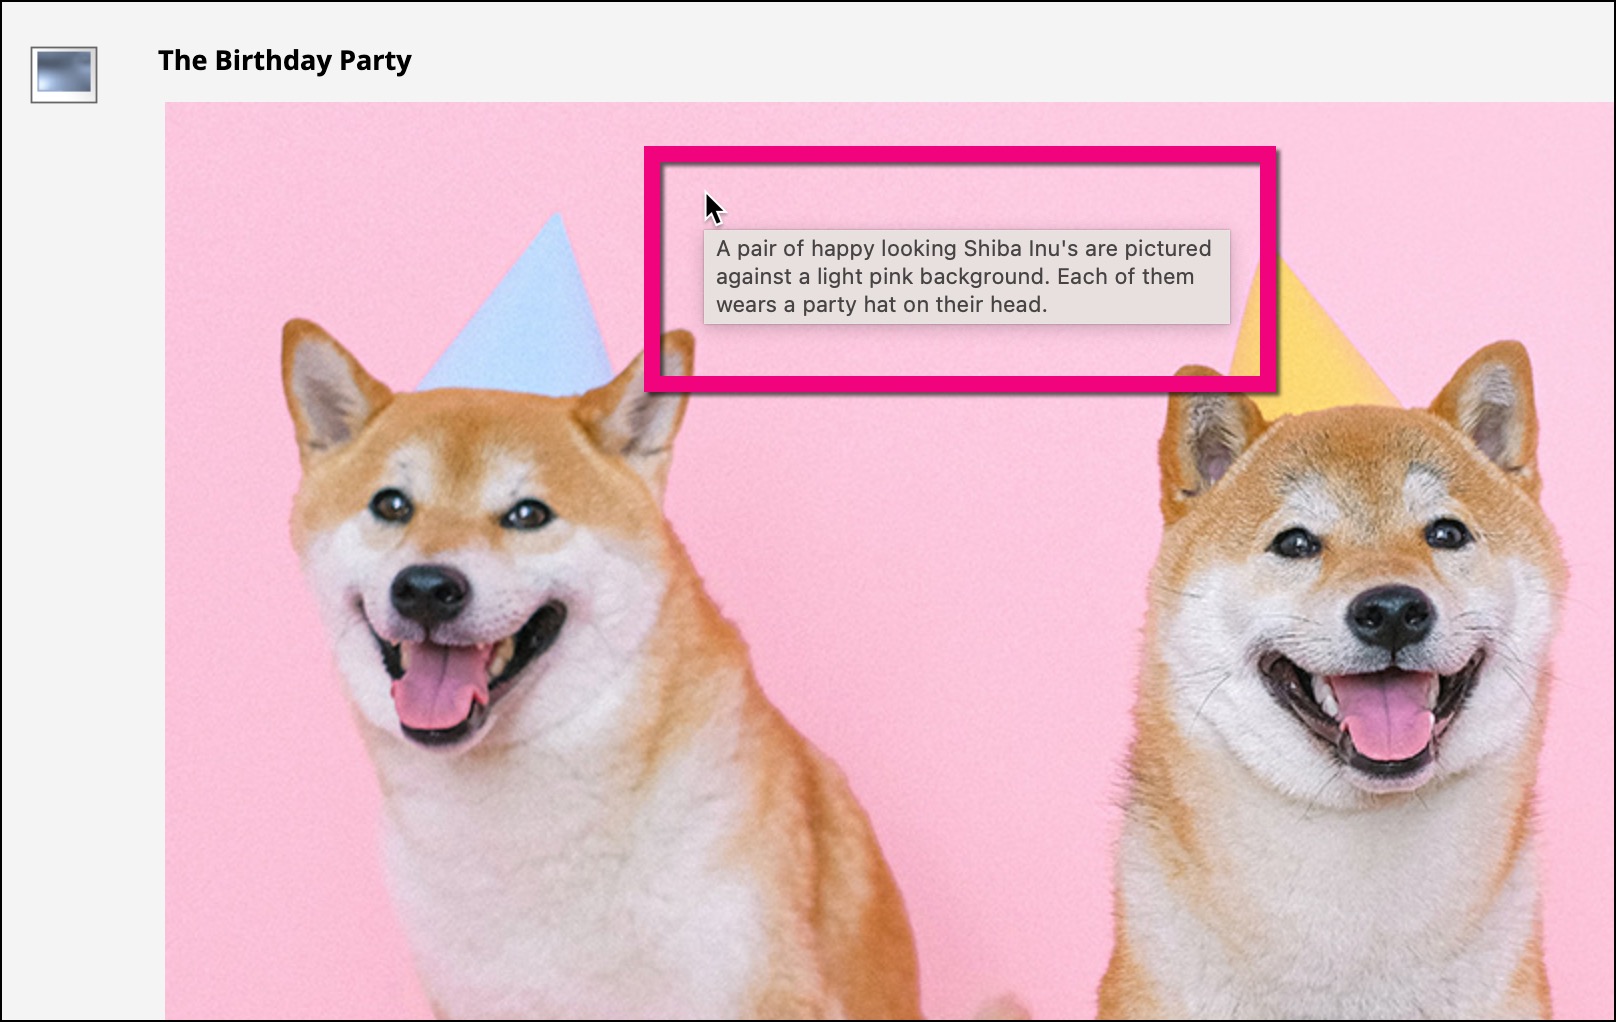
Image within an Item
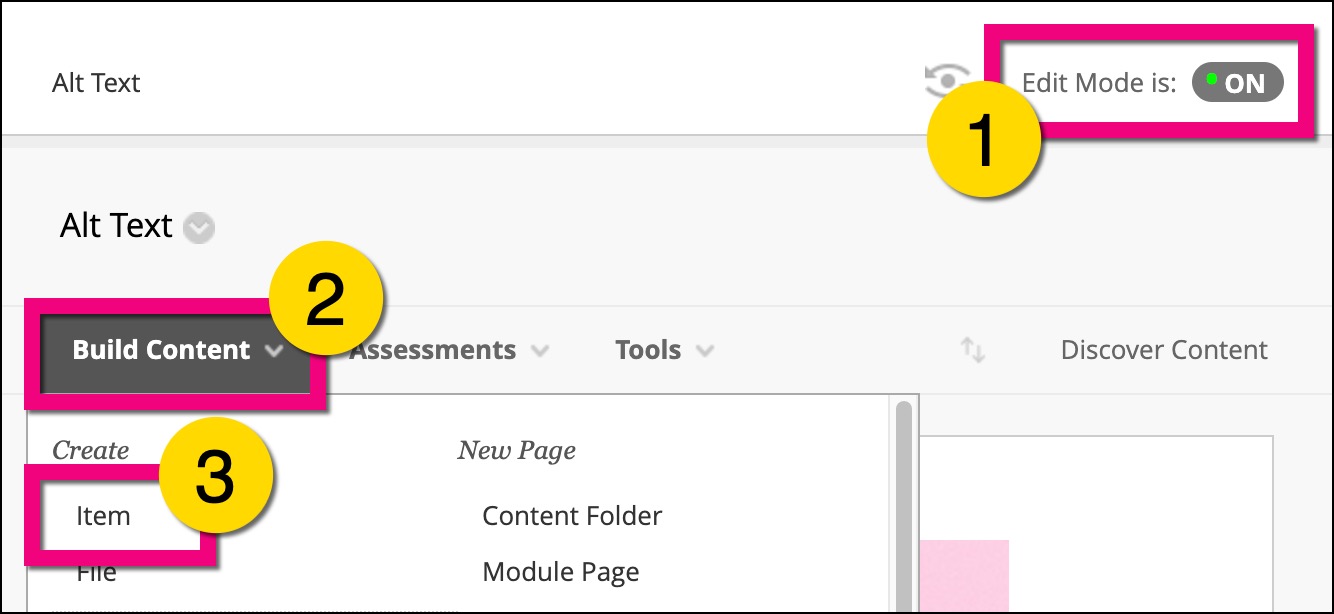
1. Navigate to where you want to add content and ensure Edit Mode is On.
2. Expand Build Content.
3.Scroll down and select Item.
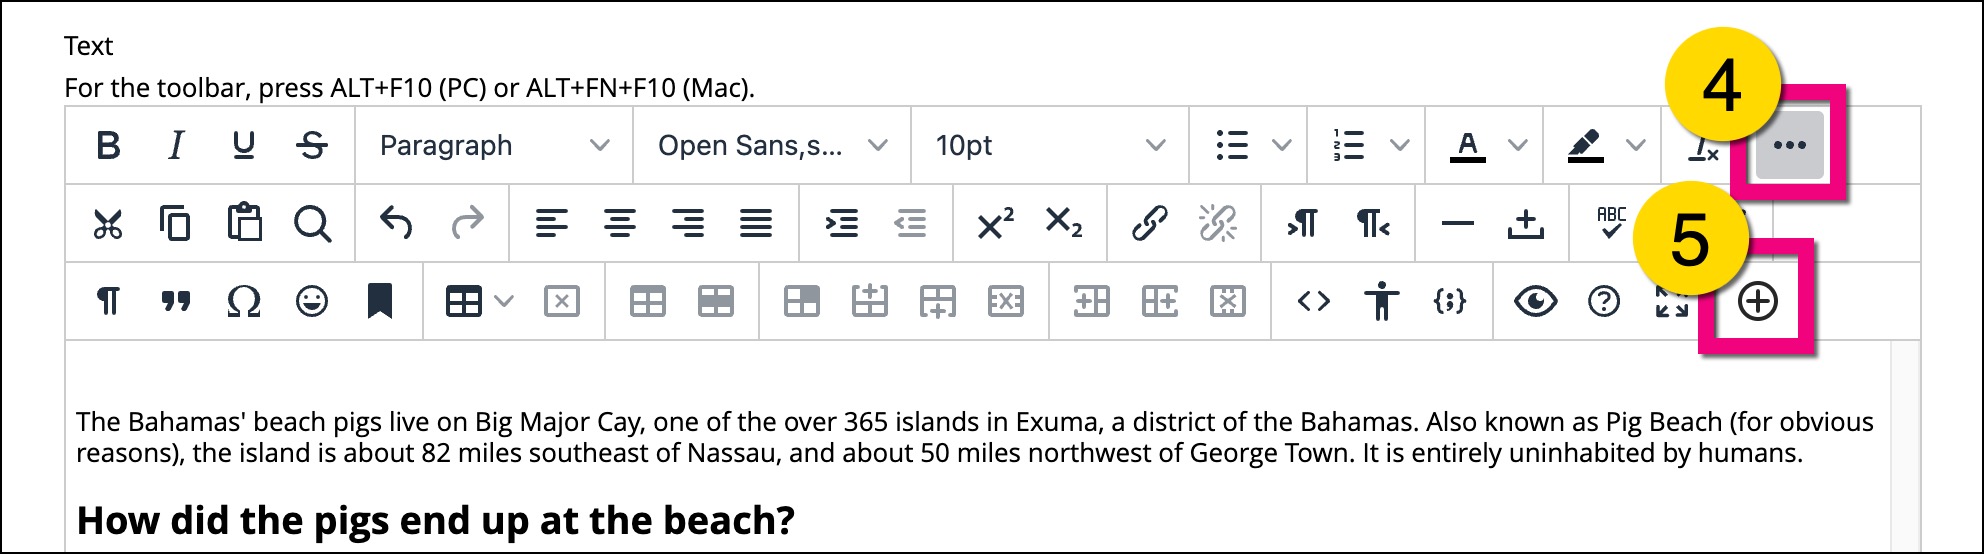
4. Make sure the full text editor is expanded by selecting the More… button (three dots).
5. Select Add Content (circle with plus in middle) Select Insert Local Files and choose the relevant image from your PC.
6. Right click on the inserted image.
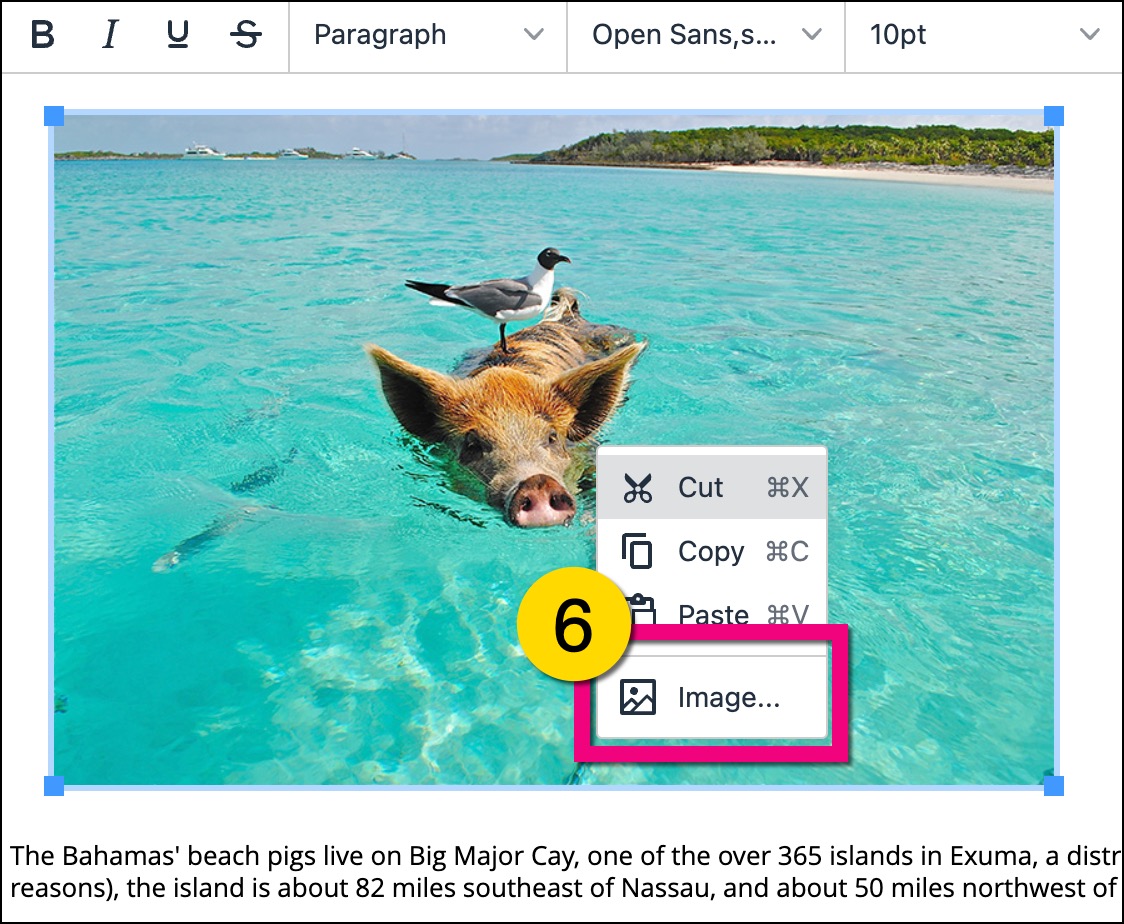
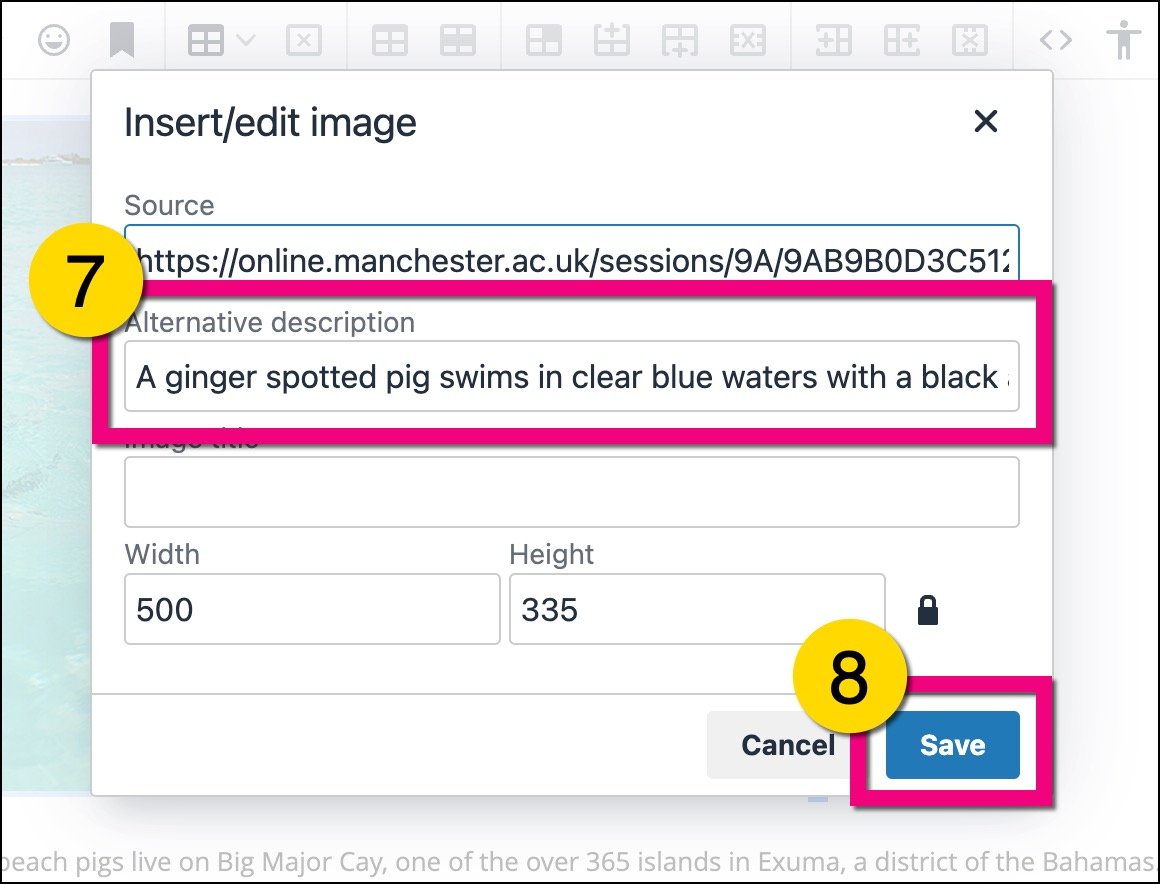
7. Type in an appropriate description of the image in the text box next to Alt Text.
8. Click Save and publish the item as usual.
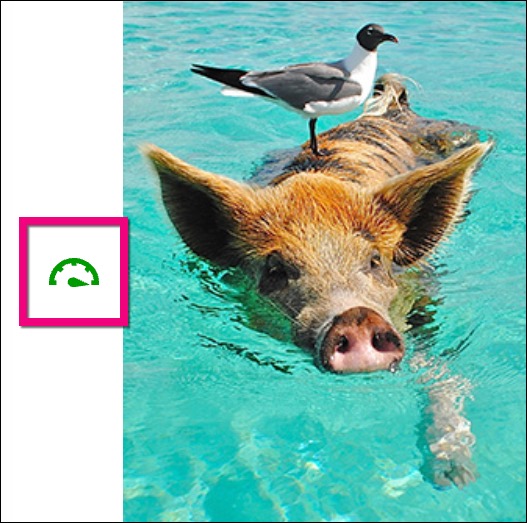
You will know alt text has been applied successfully when you see a small green gauge symbol to the left of image in the published item.
Marking Images as Decorative / Updating an Existing Image
To mark an image as decorative, follow the steps for adding an Image or an Image in an Item above but don’t (!) add any alt text description.
Once the image has been published, wait a few moments, then refresh the page. You should see a small red gauge symbol appear next to the image.

Click on the gauge icon to access Blackboard Ally. Here you will be able to click a button to Indicate the image is decorative.

As before, you will know alt text has been applied successfully when you see a small green gauge symbol to the left of the published image.
Note: You can also use Blackboard Ally to add alt text to an image if you forgot to do so initially. Simply type the description in the Add image description box and click Add next to it to apply it.
Contact Us
+44 (0) 161 306 6000